

In this post, we’ll look at how to set up a Photoshop navbar in WordPress. This assumes you’ve created a website layout in Photoshop or that you’ve designed certain aspects of the menu or navbar in Photoshop, and you simply want to re-create your Photoshop Navbar in WordPress.
Photoshop Navbar in WordPress
I had a client recently that liked most of the design and colors used in the WordPress template that we selected. However, we wanted to try something different for the navbar. We experimented with the background of each menu item, as well as the color and text used across the navbar area. We eventually decided on a solid color navbar using the same font we used in the Photoshop design. This post will explain the steps we used (including those we decided not to go with) to get the design of our Photoshop Navbar in WordPress.
Photoshop Navbar Design

We’ll start with the above design in Photoshop. We’ll focus on taking the site menu into WordPress.
Let’s first add the background behind each menu item. In Photoshop, we’ll isolate the menu item background and save it out as a .png file. This will retain transparency around the uneven edges.

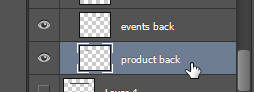
I use the rectangle marquee tool to select the background of a menu item. Then, select the layer that corresponds to that background.
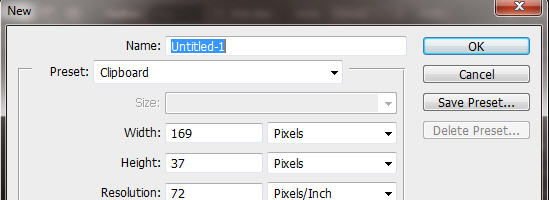
My goal is to get this background into a Photoshop file of it’s own. I do an edit/copy (ctrl or cmd – c) from the original file. This places the contents onto my clipboard. I now do a file/new (ctrl or cmd – n). The settings for the new file default to the size of what’s in my clipboard. Perfect! Click OK, then edit/paste (ctrl or cmd – v).
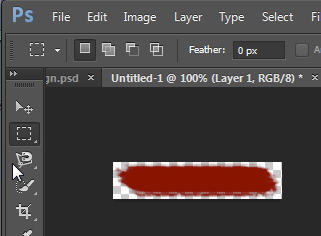
I now have the background of the menu item in its own Photoshop file. I can save this and upload into WordPress. I save it as a .png file to retain transparency around the edges. This allows this image to be used against any background color.
Upload Background of Menu Item to WordPress


The background image can be uploaded by using the Media Library in the WordPress dashboard or by using an FTP client. I use an FTP client as I like to keep all theme related images within my theme folder. Either way, the important thing is to know where your image is stored so you can tell WordPress where to find it.
Update CSS to use New Menu Item Background
If you need help in determining where to update your CSS within your WordPress theme or to find the CSS code that needs updating, refer to the the post, How to Get the Colors I Use in Photoshop to WordPress.
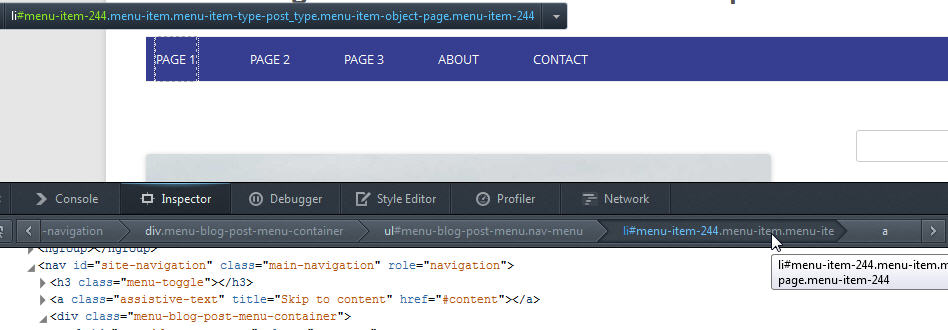
Using the steps as detailed in the linked posts above on how to use the Inspect Element option to determine what needs to be updated in CSS, I get the following screen after selecting Inspect Element for a menu item:

To get a better idea of how the CSS is coded, I click on the outer container elements (by selecting the elements to the left of the anchor tag (indicated by the blue a above which is at the top of the Inspect Element window). As I do so, I observe the selected area in the menu area of the website (the dashed lines around Page 1).
The next element to the left on the Inspect Element light gray bar still signifies the individual menu item, indicated by the dashed lines still around Page 1 of the menu bar after selecting this container. One of the classes that controls the individual menu items is called .menu-item as indicated above. The only difference between this element and the element selected above is the ‘a’ tag. When changing the background of a menu item, it should align with the individual menu item versus the anchor (a) tag. Before determining this is where we need to update the CSS, let’s verify by going one more level ‘up’ with the outer containers.
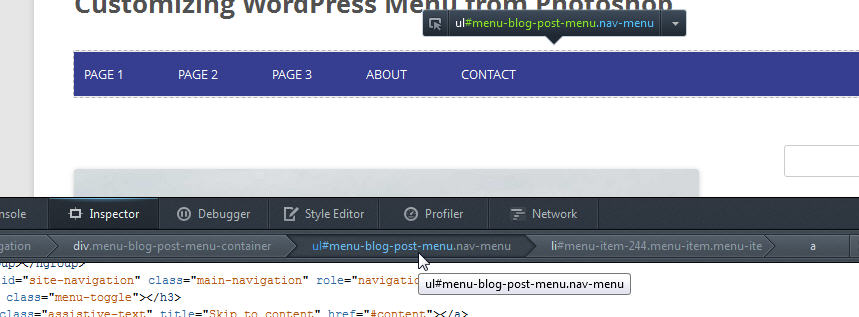
I get to the next outer container by selecting the next element to the left at the top of the Inspect Element window. This container is the entire menu (CSS class called .nav-menu). The dashed lines go around the entire menu (not as obvious in this screen shot, but were very obvious in the browser window). This container is the outer container of the individual menu items and is ‘beyond’ where I need to update the CSS. So, let’s go back to the previous container.
I now know that I need to update the CSS associated with the .menu-item class to replace the background with the new Photoshop background that I just uploaded.

Observe the CSS code on the right side when the .menu-item container is selected. We notice the the class ‘.main-navigation li’ controls the appearance of the individual menu items. This indicates that ‘.main-navigation li’ needs to be updated to use the new background image.
Let’s add the following code into our CSS. Be sure to update your theme’s CSS at the appropriate location.
.main-navigation li {
     background: url('images/menu-item-back.png') no-repeat;
     width: 169px;
     height: 37px;
}
I added the width and height so it picks up the entire image. Depending how your theme is coded, it may only show part of the image. The width and height settings ensures the entire background image shows.

When we refresh the site after saving our CSS changes, we notice progress! There are obviously items that still need updating, but the background from our Photoshop Navbar now shows up! Let’s continue updating CSS to get the menu looking like it did in Photoshop.
Updating CSS in WordPress for Menu Items
In observing the menu above, we know we need get rid of the background for the entire menu area. We also need to remove spacing (margins) around each individual menu item. Let’s add the following CSS code to our theme.
.nav-menu {
    background-color: transparent;
}
.main-navigation li {
     background: url('images/menu-item-back.png') no-repeat;
     width: 169px;
     height: 37px;
     margin: 0px;
}
We know we need to update the .nav-menu class from our previous observation within the Inspect Element option. We noticed the entire menu was part of the .nav-menu class. We set the background for the .nav-menu class to transparent. We also add the ‘margin: 0px;’ to .main-navigation to eliminate the extra spacing. Our menu now looks like:
![]()
Walla! We are much closer. We have the background appearing for each menu item.
Updating CSS in WordPress to Match Photoshop Text for Navbar
We now need to tweak the spacing of the text for each menu item so it shows up over the background image. We also need to specify the font so that it matches what we were using in the Photoshop design. There are several ways to do this, depending on which class you want to update. I added the following CSS code to my child theme:
.main-navigation {
    font-family: Arial, Helvetica, sans-serif;
    color: #fff;
}
That font-family property is required if you are using a different font for your menu that what you are using for the rest of your site. You might also want to add the .font-size property, if the size of the font is different in your menu than for the rest of your site.
I also added the .text-align property to the li tag of the class .main-navigation so the text centers over the background image.
.main-navigation li {
     background: url('images/menu-item-back.png') no-repeat;
     width: 169px;
     height: 37px;
     margin: 0px;
     text-align: center;
}
I also notice the menu items are not vertically aligned over the background image. They are a bit lower than I’d like.

When I right click one of the menu items and use Inspect Element, I notice a line-height property.
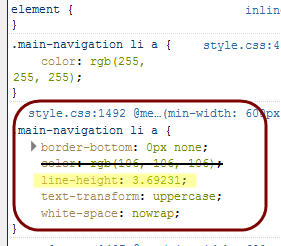
I add a different line-height value to my child theme to center the text vertically of each menu item.
.main-navigation li a {
    line-height: 3.0;
}
Note: The above CSS code may or may not be necessary for your particular theme. It depends how it is coded. If you need to do something similar and do not notice a line-height property, look for the padding and margin settings. Changing the line-height vertically centers the text within the background image.

You may have noticed that the text is capitalized. There is a property being set within the theme that is making the text appear in all caps. I am going to leave this as is. In the image of the CSS code above (that has line-height highlighted), you’ll notice the text-transform property. You can set this to none or lowercase if you prefer not to use all caps.
When the visitor mouses over the menu item, we want to change the text to a gold color. The following CSS allows for this color change:
.main-navigation li a:hover {
     color: #ffd700;
}
After all that work, we decided to go with a solid color background for the navbar! Time wasted? I don’t think so. First, we get this post out of it! And, second, the next time we want to do this for a client, it’ll be easier. Since we went with a solid color background for the menu, let’s look at how to change the background of the entire navbar.
Set Solid Color Background for WordPress Menu
First check the customize options under Appearance. Some themes will have the option to change the background of the navigation menu within the Customize screen.
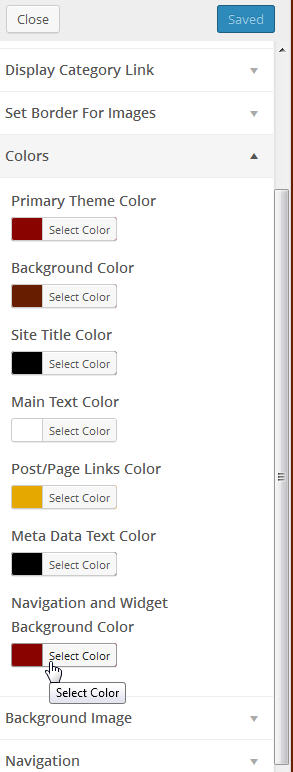
If your theme does not have the option to change the background color of the menu through the Customize options, you can update the CSS code. Using the Inspect Element option within our browser window, determine the class that needs to be updated to set the background color of the navbar. For this particular example, the class is .nav-menu. We add the following CSS to set it to the background we desire.
.nav-menu {
    background-color: #6b1b00;
}
The menu now looks like this:

Now you know how to take your Photoshop navbar in WordPress. The steps you need to do this will vary depending on your theme, but the steps above show you how to find what needs updating to get your Photoshop navbar in WordPress.
What has been your experience in customizing the WordPress menu bar to match what you designed in Photoshop? What best practices would your recommend?