

This post details the steps to move a Photoshop header into WordPress. These same steps can be performed if you do a mock up of the entire website in Photoshop, then want to customize your WordPress theme to more closely match your design in Photoshop. In this series, we will be doing a post for each ‘section’ of your website layout in Photoshop and moving it into WordPress. This post focuses on the header section.
Recently, my client wanted specific artwork included within the header of their website. The artwork was a combination of their logo and their tagline. We determined the best way to do this was to design the header in Photoshop, then move the Photoshop header into WordPress. The rest of the site could be easily enough done with a WordPress theme, but the header needed to be customized.
Set Size of Photoshop Header
If possible, before you design the header in Photoshop, check inside your WordPress theme for the recommended header size.

Go to the header option under Appearance of the WordPress dashboard. In the Custom Header option, the recommended size is often listed.

You don’t need to follow these size recommendations as you can update the CSS to make the header whatever size you’d like. But, if you want to keep customization to a minimum, I recommend following the suggested size.
Save Your Photoshop Header
After the header is designed in Photoshop, save the header for use on the web. If the header is part of a larger image (you did the entire design in Photoshop), save the header layer. I tend to save headers in the .png format since the header is on every page (png gives me a higher quality image than jpg, plus png retains transparency). But, you can also save the header as a .jpg. Choose the file format that works best for your situation.
Upload Photoshop Header into WordPress
There are several ways to update the header within a WordPress theme. Each method is detailed below. The methods are listed in order of recommendation. To keep the new header most congruent with your theme, use the first method that works for your theme.
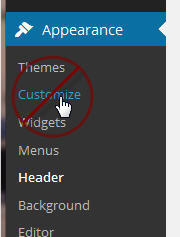
Upload a Photoshop header into WordPress using the theme custom options within the Dashboard. You may be tempted to use the Customize option under Appearance, but often that option is limited to selecting a header image you have already uploaded. Instead use the Header option under Appearance.
After selecting the Header option, click on Browse to upload your Photoshop header into WordPress.
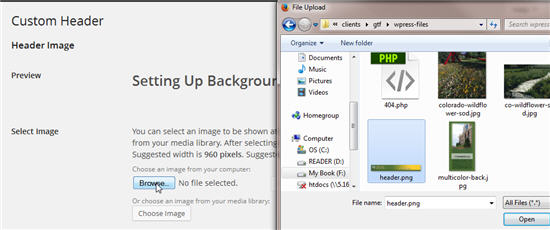
Another option is to upload the Photoshop header into WordPress by using the Media Library option from the WordPress Dashboard. If you do this, you can still go to the screen above and instead of selecting Browse, select Choose Image. This will let you select an image from your Media Library.
The other option to upload your Photoshop header is to use an FTP client and upload the image inside your theme (which is my preferred method as I like to keep all images theme related inside my theme folder).
Update WordPress CSS to Use a Photoshop Header Image
If you are not able to set the header image as detailed above or you used an FTP client to upload your header image, you can update CSS to tell WordPress to use your new Photoshop header.
If you need help in determining where to update your CSS within your WordPress theme or to find the CSS code that needs updating, refer to the the post, How to Get the Colors I Use in Photoshop to WordPress.
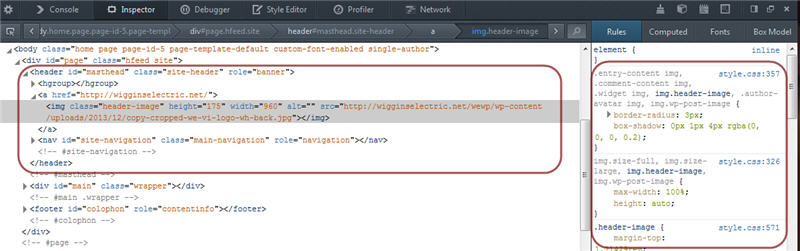
I use Inspect Element (see links above) to determine where to update my WordPress CSS. The image above indicates what needs to be updated in CSS.
The actual CSS for your theme depends on how the header image is coded within your WordPress theme. Using the steps listed in the links above will help you find the right CSS for your theme.
Set Header Image in CSS
Although I don’t recommend this method, as the code will need to be updated if you ever change the header image, you can hardcode your header image into your WordPress theme by using the background property in CSS.
.header-image {
     background: url('images/site-header.jpg') no-repeat;
}
This requires you uploading your header image to your WordPress site. I tend to keep images used within the CSS inside an images folder of my theme. However, you can also upload the image via the Media Library from the WordPress dashboard and set the url of the background image accordingly. If you need more information about using an image for a background of a CSS class or id, see Placing a Photoshop Background to WordPress.
Move Header to Top of Browser Window

Many templates leave a margin between the top of the browser window and the top of the header. Let’s look at how to fix this so the header starts at the top of the browser window. We’ll use Inspect Element to see what’s currently being set.

The image above shows the Inspect Element window after right-clicking the header within the browser window. Your template may differ from what we see here, but notice the CSS code on the right side that controls the margin-top setting. (By the way, I didn’t get this the first time! I had to experiment with a couple different CSS classes before I found the right one.)
When the Inspect Element window first came up, it showed the CSS code for the element labeled 1 above (.site-header). I didn’t notice any CSS settings that would affect the margin area above the header so I started to click ‘backwards’ through the ‘containers’ listed across the top of the window (lighter gray bar at the top of the Inspect Element window. This is the beauty of the Inspect Element functionality. It lists all the nested containers for the selected element).
The #1 arrow is where I started. I didn’t notice any CSS code that would affect the top margin, so I clicked on #2. This brought up the CSS code above. We notice on the right side there is a margin-top property being set for ‘body .site’. This tells me I need to add CSS code that will remove the margin-top setting of 3.42857rem.
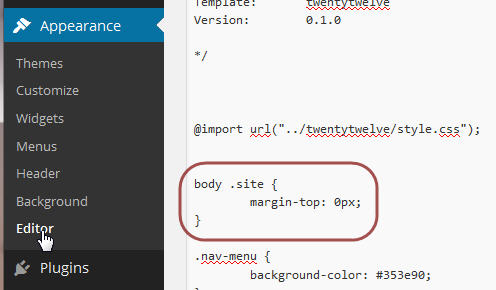
I go to where I need to update CSS for my theme (your location may differ as it depends on your theme). For my theme, I make this change inside the CSS code (style.css) of my child theme. I set the margin-top property back to 0px(zero px) for ‘body .site’.

After saving the CSS file and refreshing the browser window, the top margin is now gone from above the header in the browser window.
Additional CSS Updates for moving Photoshop Header into WordPress
If you need to make additional changes for your new Photoshop Header inside WordPress, you may need to use one or more of the following the CSS options. In the examples below, we’re using the .header-image class to correspond to what we saw in the example above. Replace .header-image with the class or id that’s used in your WordPress template.
.header-image {
     width: ###px |  %;
     height: ###px  |  %;
     margin: #px #px #px #px;
     padding: #px #px #px #px;
}
The width and height can be the actual width and height in pixels or expressed as a %. Margin and padding can be set for all sides (top. right, bottom, left) or set individually as we did in our example above for margin-top.
There may be additional updating needed for your Photoshop header brought into WordPress depending on your theme. But, over the years of using WordPress, the steps listed above will cover most of the necessary steps to bring your Photoshop header into WordPress.
What has been your experience of bringing over a Photoshop header into WordPress? What additional settings have you ran across that need updating?