Having used Photoshop for many years, I find there are specific tricks I do over and over. Here are my 5 of my favorites:
Multiple Undo’s
What I love about Photoshop is there always something new to learn. I think this feature has been there for a long time, but I found it just in the past year. We are all familiar with the ctrl-z keyboard shortcut to undo the last step. Did you know if you add the alt key it will continue to undo previous steps? Pressing crl-alt-z multiple times will continue to go back multiple steps. Actually, keeping ctrl-alt pressed and just clicking on z will continue to go back.
Copy Layer Style
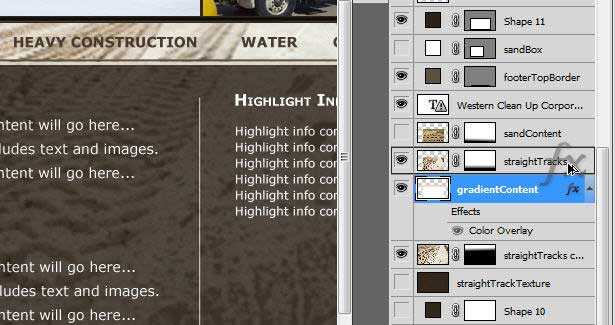
There are multiple ways to do this, but my favorite is to hold down the alt key, click on the ‘fx’ icon on the layer that has the style I want to copy, then drag the ‘fx’ icon to the layer I want to apply the same style. Walla!
Copy Layer
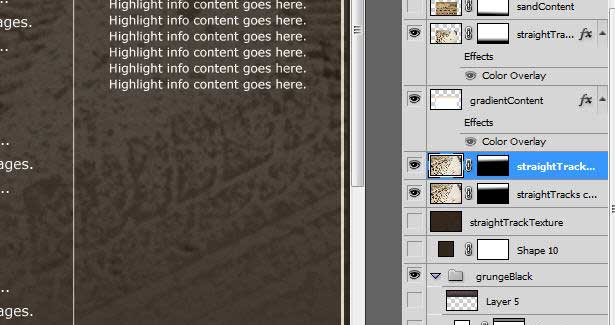
Although this one is very common, it’s always good to mention it again. I use it all the time.
Highlight the layer you want to copy in the Layers panel. Press ctrl-j. A copy of the layer will show up above the original layer. By default, the name of the layer will be the same name as the original layer with -copy at the end of it.
Trim Image
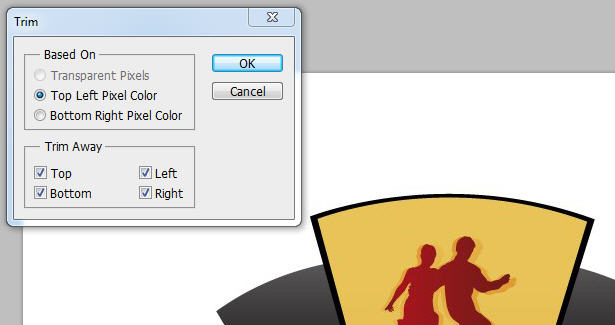
I use this technique for getting rid of extra space around an image.
This can be used to remove transparency or a solid color.
To do this technique, choose Image/Trim. Select the either transparency or color (top left or bottom right color). Click ok and walla!

You can also select which side of the image you want to trim. I don’t think I’ve ever changed the default settings which is to trim all sides.
Solo Layer
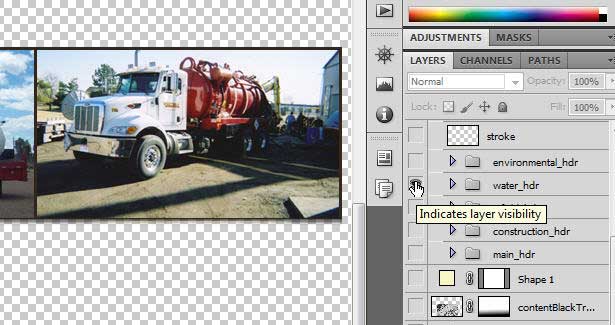
I don’t use this technique as often as some of the others, but when I need it, I am glad I have it in my repertoire of techniques.
If I just want to preview one layer, I hold down the alt key and click on the eye icon for that specific layer. All the other layers turn ‘off’.
Go Back to Last Saved Version
This handy menu it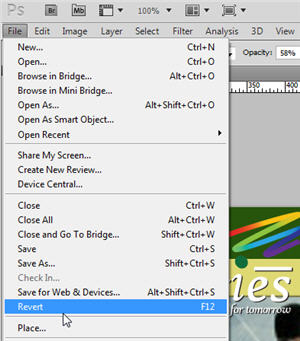 em can save you from having to close the file and re-open it when you want to go back to the last saved version.
Click on the File menu and notice the Revert option. This option quickly takes you back to the last saved version.
Select a Layer Automatically
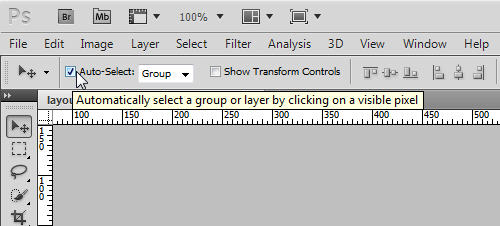
I am throwing this one in here because it comes up a lot when I am training. This is a life saver for some of my students. If you are not used to having to select the desired layer from the layers panel, you’ll love this option.
There is an easy-to-miss check box in the control panel (below the main menu). To see this, you have to be on the move tool (the black arrow at the top of the tool box). Notice in the control panel to the far left a very simple checkbox called Auto Select. That’s it! Turn that on and you will be able to click anywhere in your document and Photoshop will automatically select the layer underneath your cursor. This setting is especially handy if you are working with text and you just want to click and update your text.
Another Layer Select Technique
This technique saves you from having to select the desired layer in the layers panel. It’s especially handy when you have layers on top of layers in your document. Make sure the Move Tool (black arrow at top of toolbox) is the active tool. Mouse over the area of your document that has the desired layer. Right-click. A context menu pops up showing you all the layers underneath your cursor. Select the desired layer.
Those are tips I use often. What are your favorites? What have I missed?