Color correcting an image is one of the most common uses of Photoshop. And, you don’t need to be an expert to color correct an image. These five quick tips show you different ways on how to color correct on image.
Let’s get started.
Color Balance Adjustment Layer
 |
 |
This option is good for removing a tint. I always recommend using an adjustment layer as they are non-destructive (can either remove the adjustment or edit the adjustment at a later time).
Before applying the color balance adjustment layer, I always make a copy of the background layer, then turn off the background. Although this step isn’t absolutely necessary since we are using an adjusment layer, I’m just in the habit (or try to be!) of making a copy of the original image.

To make a copy of the background layer (original image), select the background layer in layers palette and press cmd/ctrl-j (layer/duplicate layer from the main menu). Then turn off the background layer by clicking on the visibility icon.

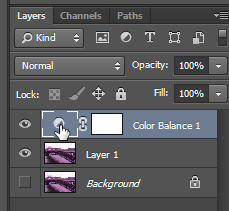
With the top layer selected, choose the Color Balance adjustment layer option in the Adjustments panel. (Adjustments panel is usually above the Layers panel on the right side.)

This will bring up the Properties for the Color Balance adjustment layer. Select the slider that has the tint color and move it away from the tint color. For example, since this image has a red tint, I moved the cyan/red slider towards cyan to remove the red tint. You may also want to adjust the other two sliders to get the color you want for the image. When finished with the adjustment, collapse the Properties panel (click on double right arrow at the top right of the panel).

You will also notice the adjustment layer at the top of the layers panel. You can always go back in and make adjustments to the color balance properties by clicking on the layer thumbnail.
Curves
 |
 |
| Before | After |
Although curves comes with an intimidation factor, after using this technique several times, you’ll find curves starting to make sense. I’m not going to give you the techno-jumbo in this technique. Instead, I’ll give you the visual explanation of how to use the curves adjustment option.
Start with a copy of your background as described in Color Balance Adjustment Layer above.
![]()
As explained in the Color Balance technique, I recommend using an adjustment layer. To apply a Curves adjustment layer, click on the Curves Adjustment layer in the Adjustment Layers panel.

The Curves properties panel appears. Notice the drop down option next to the RGB channel. Not only can you change all channels at one time (your image is a combination of red (R), green (G) and blue (B) channels), you can also change the individual channels. If you reviewed the Color Balance Adjustment Layers above, you are also aware of the ‘opposite’ colors of each of these individual channels. For example, if I reduce Red, I’ll likely introduce cyan. Blue – yellow, green – magenta. Let’s select the red channel since this image has a red tint to it.
The original curve is a diagonal line from bottom left to top right. If I want to effect the reds in the darker areas, I adjust the line towards the bottom left. If I want to effect the red in the lighter areas, I adjust the line towards the top right. If I want to effect the red tone in both areas, I can adjust the line in the middle area.

Since this image has an overall red tone, let’s drag the diagonal line down from the center as shown above. If we drag it down, we reduce the color and also add the opposite color. If we drag it up, we add more of that color channel and reduce the ‘opposite’ color. Just to experiment, drag the same point down farther and you’ll see a lot of cyan introduced. This shows how the ‘opposite’ colors work together.

To remove some of the cyan introduced when we adjusted the Red channel, select the blue channel and drag the middle of that line down slightly. You can continue to adjust the curves in the various channels till you have the color you desire.
Increase Contrast
 |
 |
| Before | After |
This technique is great for images that just need to pop a bit more. We are going to increase the contrast by using the Levels Adjustment Layer. The end result of this technique is that we’ll have ‘black blacks’ and ‘white whites’ in our image.
Make a copy of your background layer as described in Color Balance Adjustment Layer above.

Select the Levels Adjustment Layer icon from the Adjustments panel.

The Levels properties panel shows a histogram. This is a quick visual that shows the range of tones in the image. This particular histogram shows a lack of light/white areas. The data on the histogram doesn’t extend all the way to the right, nor is it all the way to the left. But the darker tones come closer to a pure black than the lights to a pure white.
We are going to adjust the ‘sliders’ right under the histogram to give this image more range of tones. Click and drag the white arrow (adjusts the light/whites area of image) to the left until it under the right edge of data of the histogram (see setting in above image). This now makes that almost-white colors white in the image. If needed, do the same for the black arrow on the left. Click and drag that black arrow (adjusts the darks/blacks) to the right until it is just under the left edge of data of the histogram. You can also adjust the midtones by clicking and dragging the gray slider.
Make Colors Pop
 |
 |
| Before | After |
If you want the colors in your grayish image to pop, try this technique. These steps will make the light areas lighter and your dark areas darker while softening the image.
Make a copy of the background layer (described above.) However, this time keep the background layer visible.

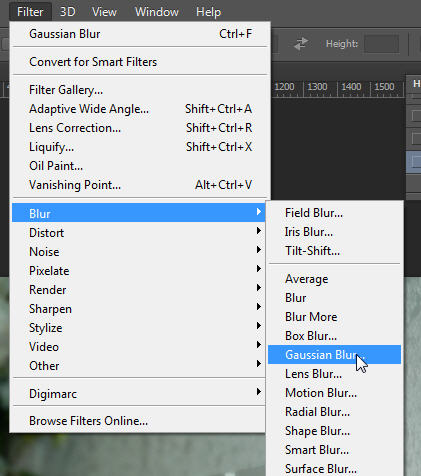
With the top layer selected, add a gaussian blur (filter/blur/gaussian blur). Set the gaussian blur to an amount that blurs the detail, but keeps the shapes intact.

Now, comes the magic! We are going to change the blend mode of the top layer. The blend mode option is at the top of the layer panel.

With the top layer selected, change the blend mode from Normal to Overlay. Or, experiment with some of the other blend options.
Remember, this technique works best on ‘gray’ images.
Auto Color
This is the quickest way to color correct an image, although probably not the most accurate. If you need something quick and dirty, this is quick and dirty! But, I’d recommend one of the options above, if you have time.
 |
 |
| Before | After |
Make a copy of your image in Photoshop by duplicating the layer (cmd/ctrl-j). With the copied layer selected, choose Image/Auto color from the main menu.

Photoshop will determine what needs to be adjusted and perform the color correction for you. The downside of this option is that you are depending on Photoshop to determine the best color adjustment. This may work, or you may need to try one of the other options listed.
Remember, you’ll probably use only one of these techniques to color correct your image.
What techniques have worked well for you when color correcting an image?
Thanks. Your guidance and tips are important and we appreciate your efforts for sharing this great information.
Well described post. Thanks for sharing this useful information to color correction tips. As always awesome content, I love reading your articles, much appreciated!
Your tips help me a lot. many many thanks for sharing with us.
You 5 tips for color correction was really so helpful for me. Thanks for sharing with us.